
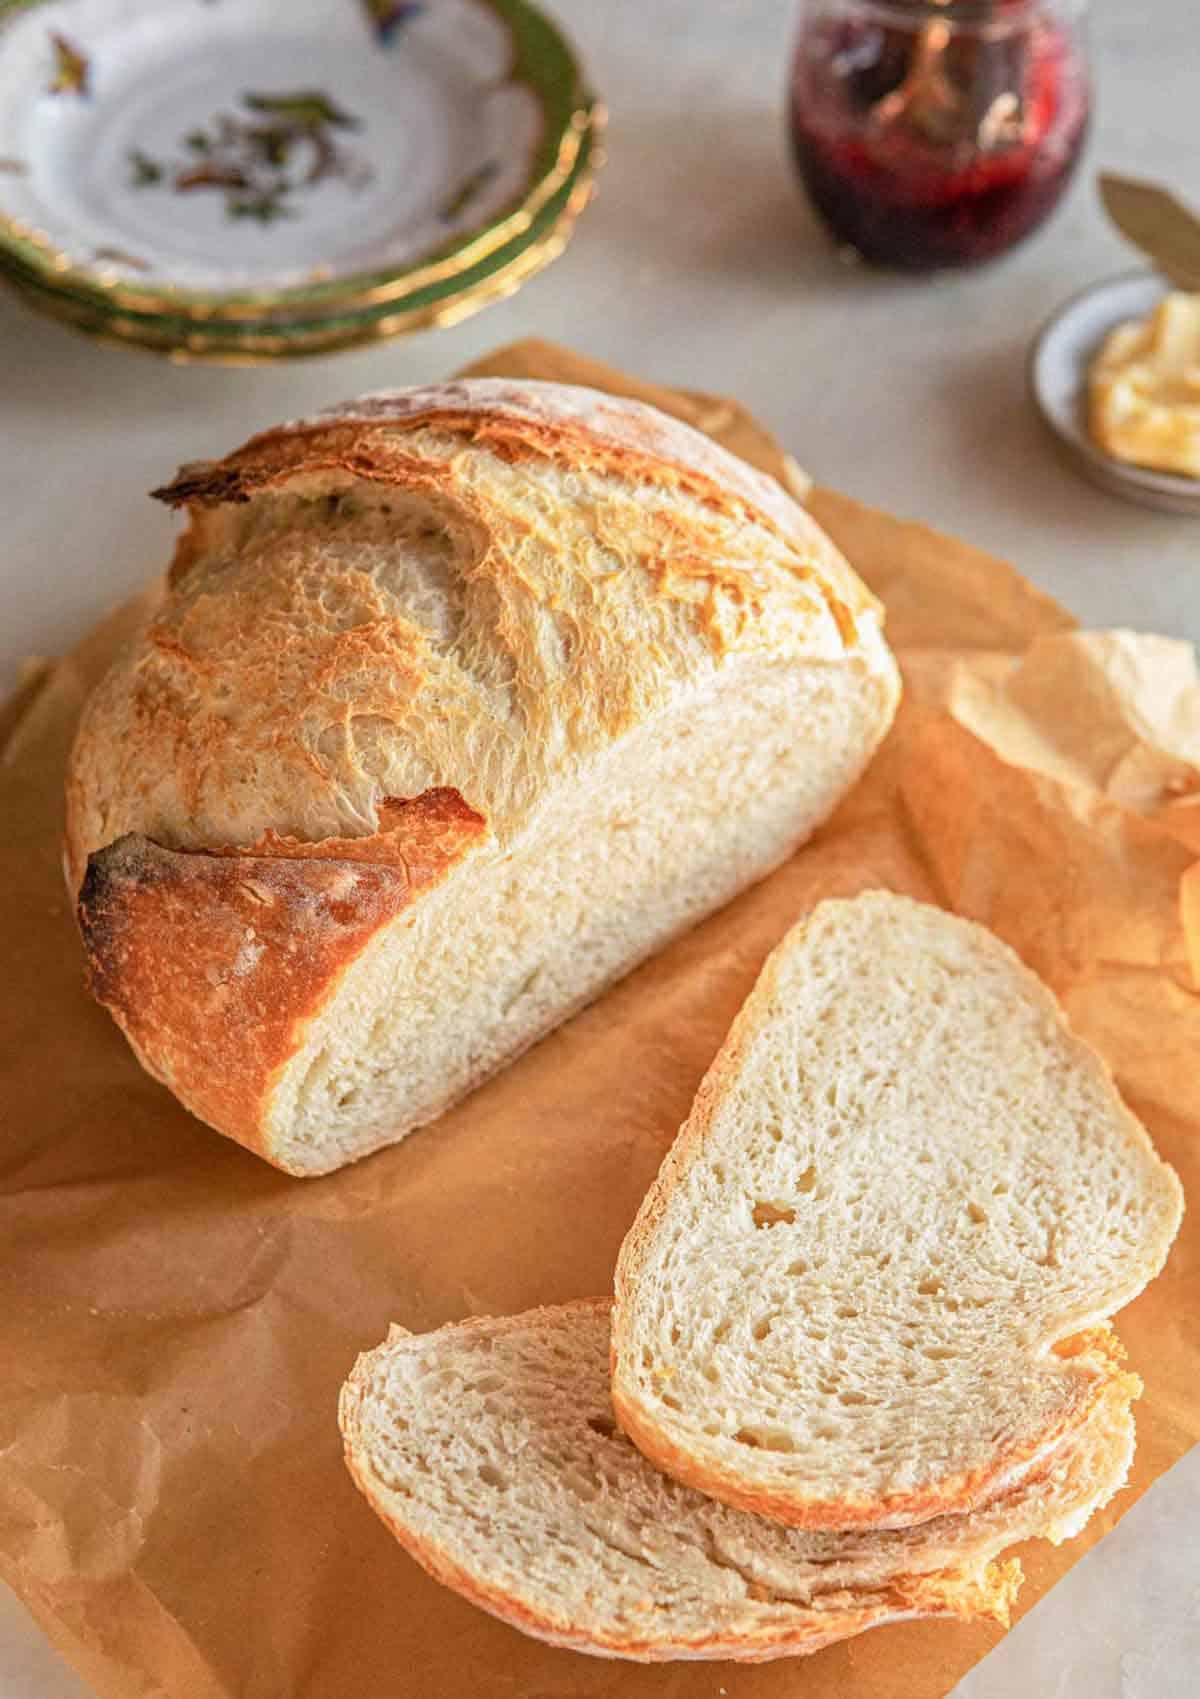


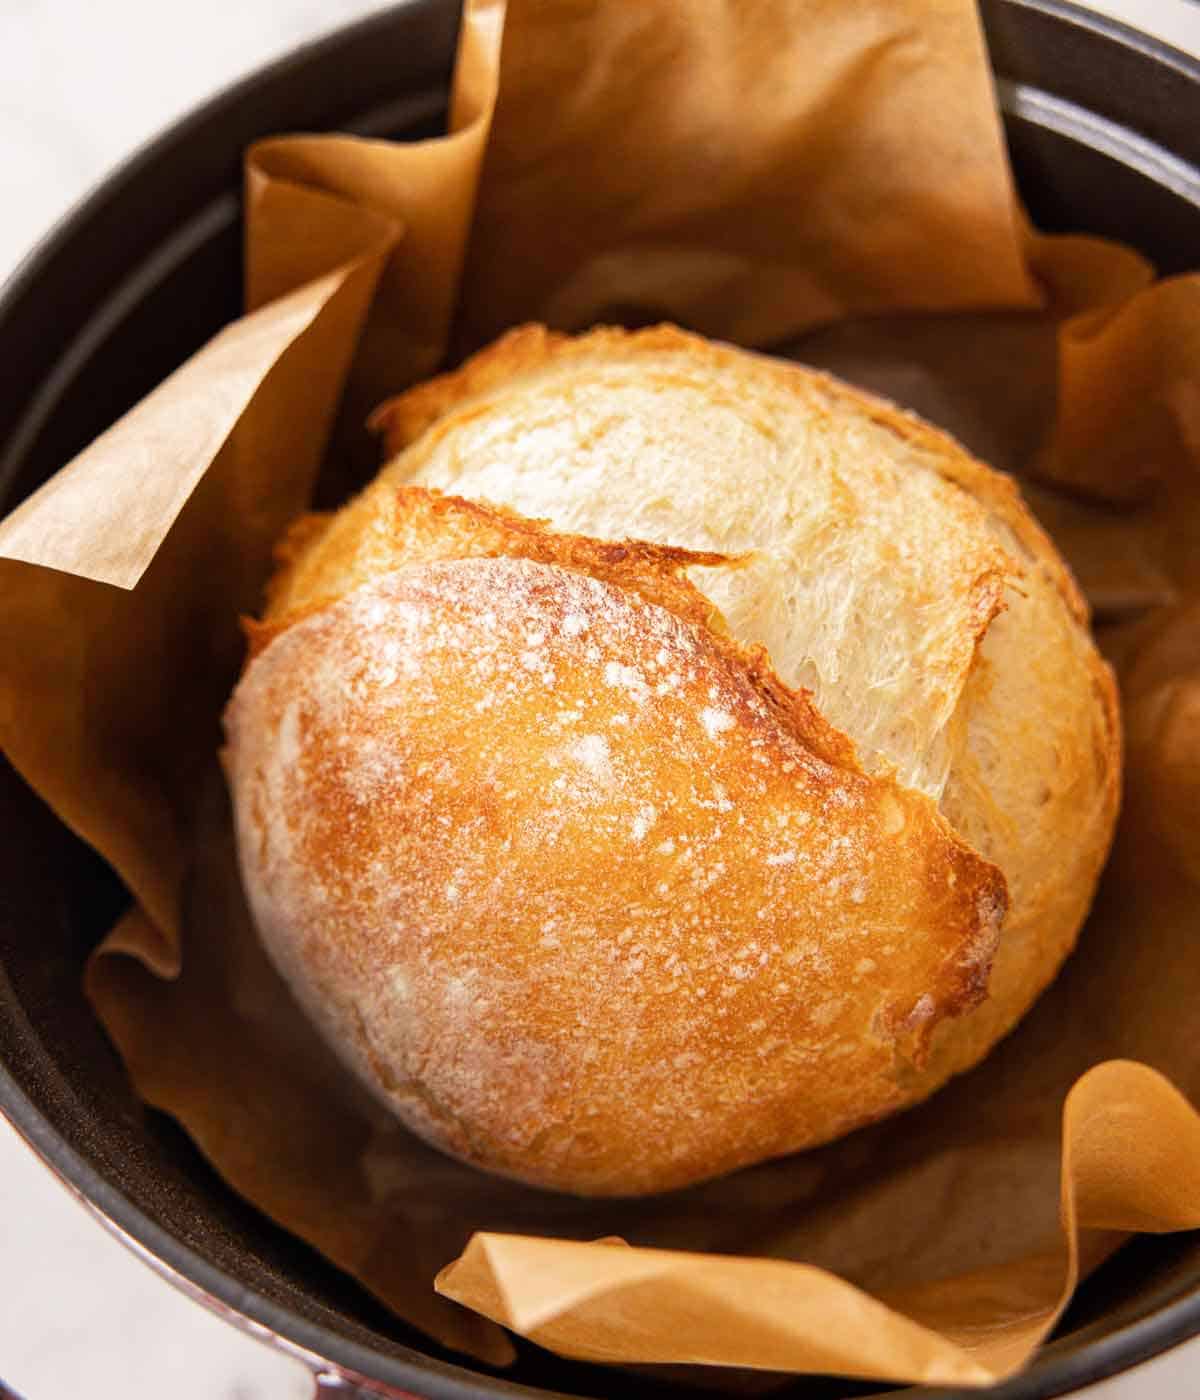
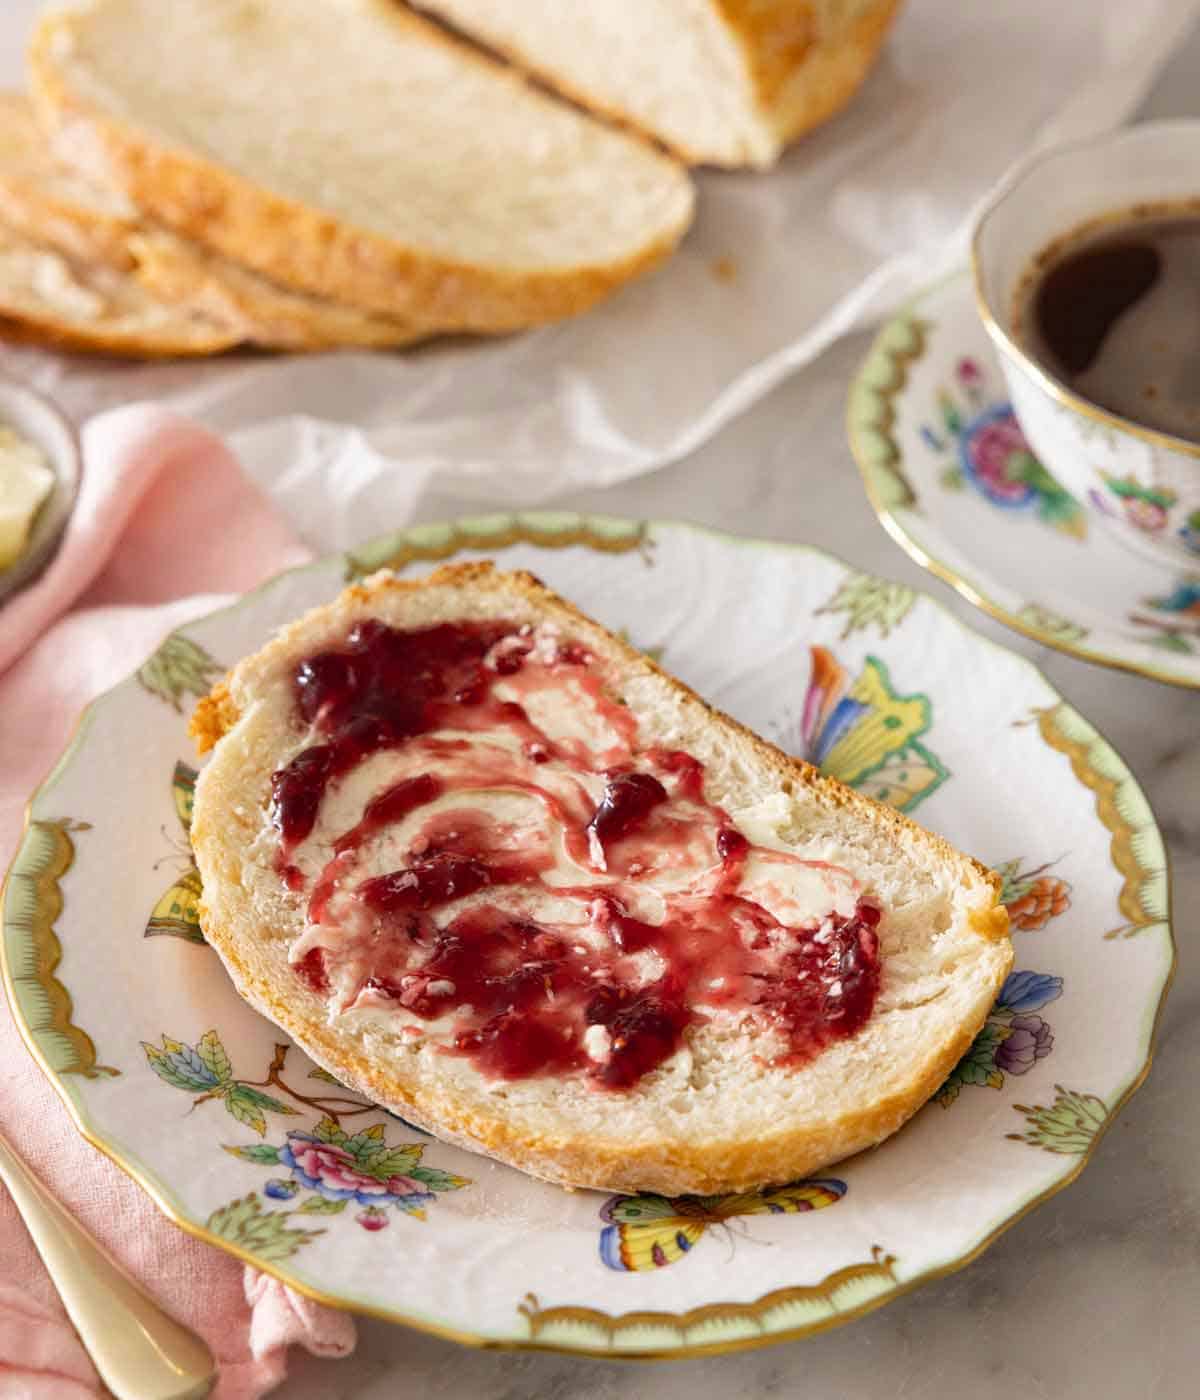
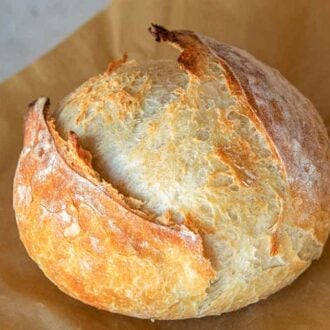
There is nothing better than homemade bread straight from the oven, especially this artisan bread. It’s such an easy bread recipe to make, and it pairs perfectly with any dips, soup recipes, and saucy recipes. It’s so flavorful and chewy on the inside and delightfully crispy outside. You won’t be able to get enough of it.
Baking bread can be intimidating, but this bread recipe comes together so effortlessly you’ll want to make it again and again. You don’t need any special equipment, and you don’t have to spend ages kneading it; the bread practically comes together on its own after you’ve combined the ingredients. For another bread recipe, check out my focaccia recipe, brioche bread, and dinner roll recipe as they also come together easily with minimal ingredients.
What You Need to Make This Recipe
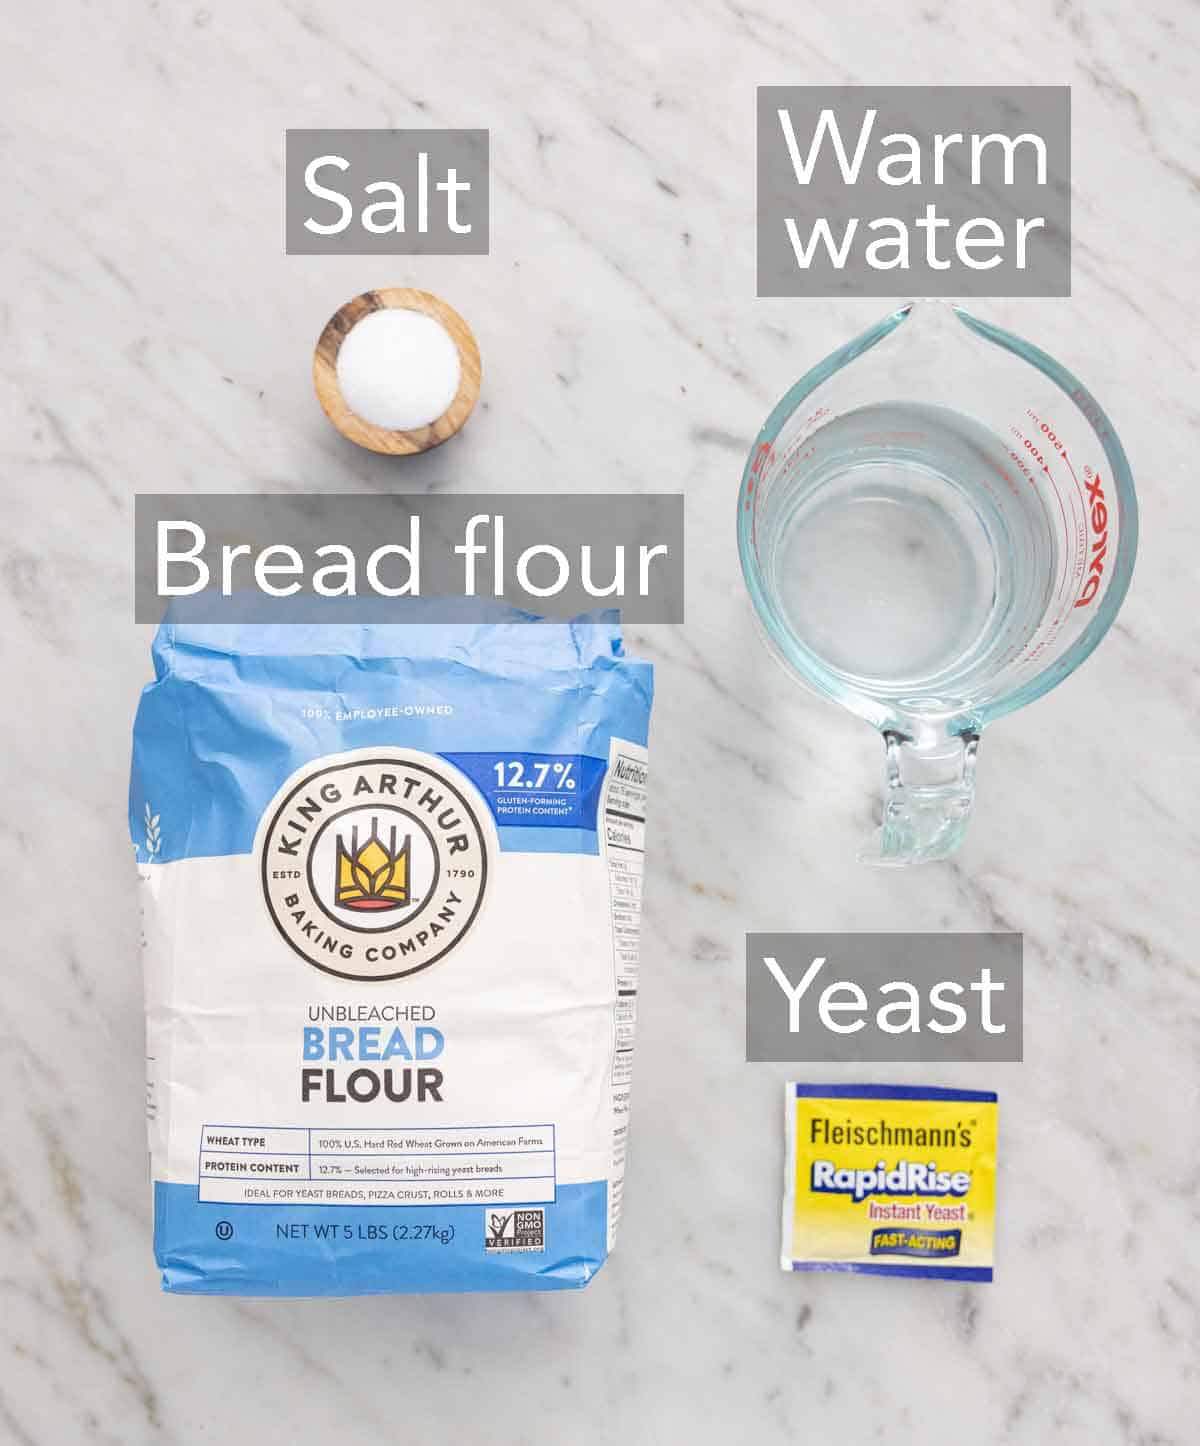
Bread flour — while you can use all-purpose flour if you do not have bread flour, I highly recommend using bread flour for this artisan bread as the higher amount of protein in bread flour produces a more robust and chewier bread.
Instant yeast — always double-check that your yeast has not expired! I’m using instant yeast for this bread recipe, so I don’t have to dissolve the yeast in water first. If you do not have any yeast on hand, try making my Irish soda bread instead.
Salt — do not skip out on the salt as it adds flavor to your bread.
How to Make Artisan Bread
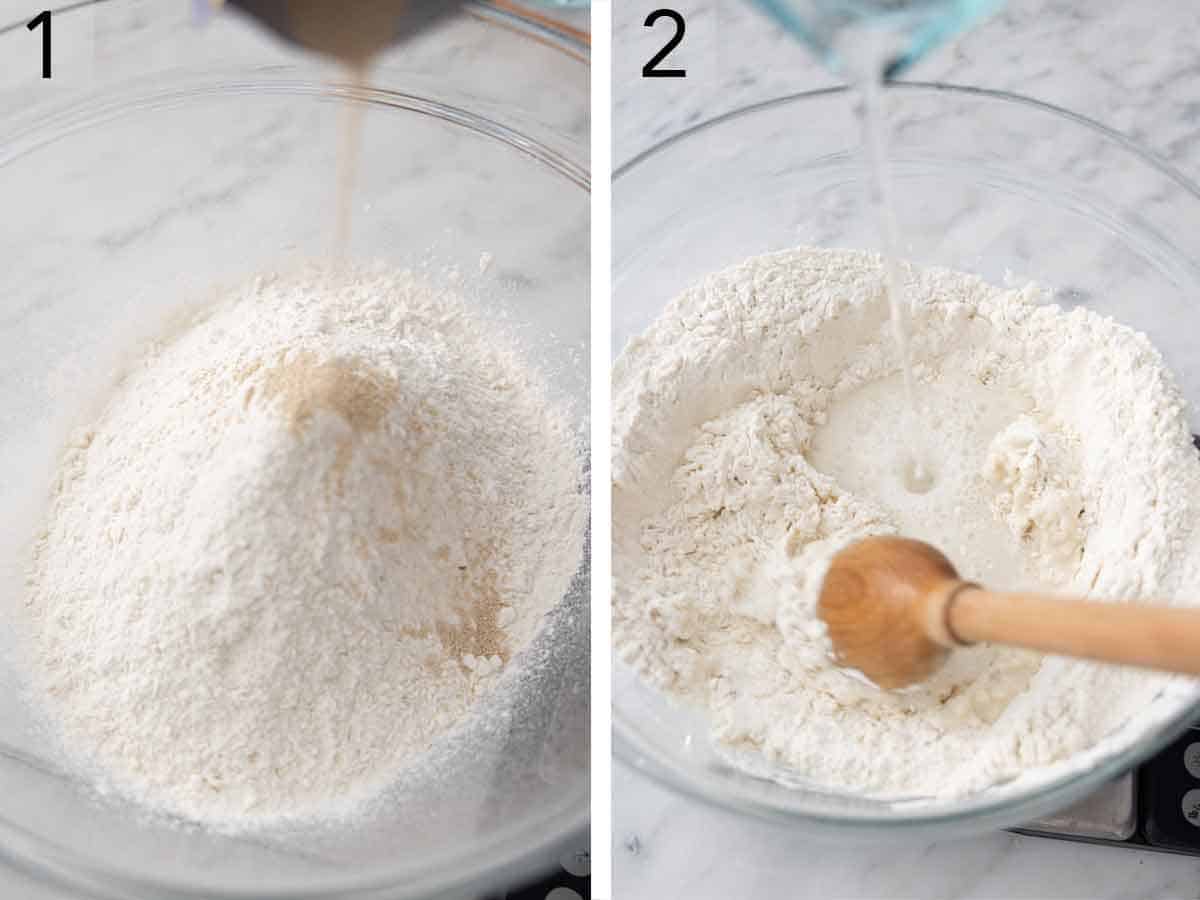
1 In a large mixing bowl, add flour, yeast, and salt, stirring to combine with a large wooden spoon.
2. Stir in water until the mixture is very sticky and no lumps of flour remain.
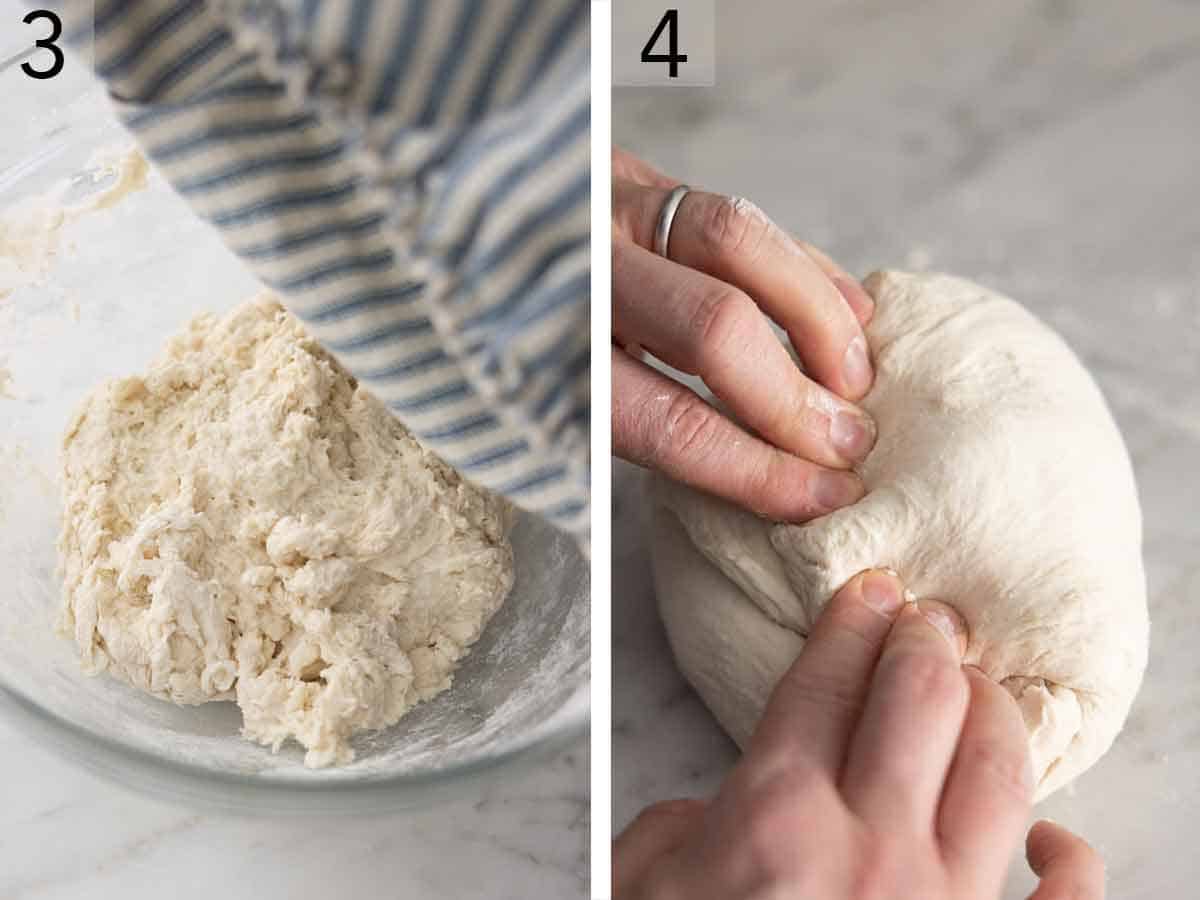
3. Cover and place in a warm, draft-free area until doubled in size, about 1½ to 2 hours. Alternatively, allow for an overnight rise by covering and refrigerating until doubled in size, about 8 hours.
4. Preheat the oven to 450°F. Place a large empty Dutch oven with a lid in the oven for at least 30 minutes. Next, uncover your risen dough and using lightly floured hands, reach down one side of the dough to the bottom of the bowl, pull up, and stretch the edge of the dough over the center toward the opposite side. Turn the bowl 90 degrees and repeat the folding and turning, working in a circle around the dough until it starts to hold its shape, about 8 to 10 rotations. Turn out the dough onto a lightly floured surface, placing it seam side down. Shape into a round loaf.
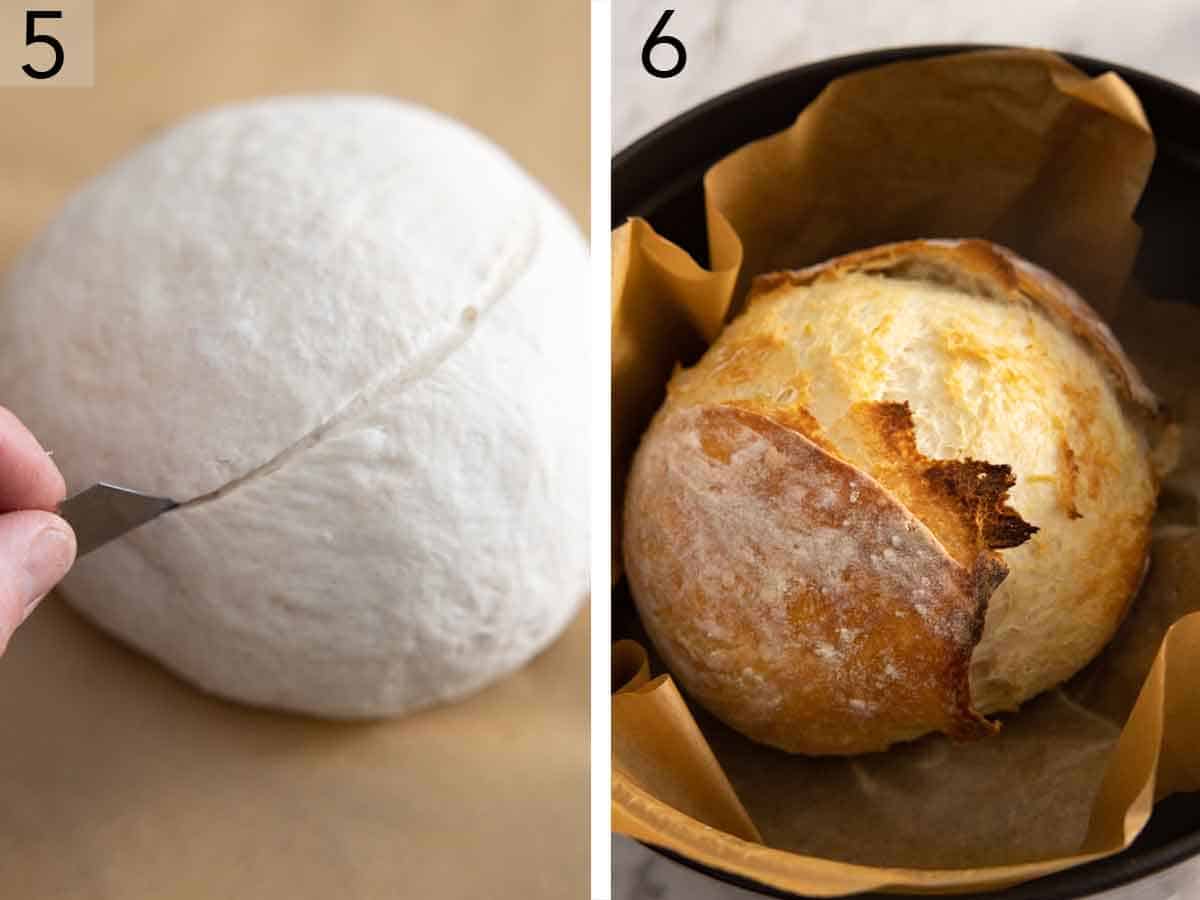
5. Transfer the dough onto parchment paper and sprinkle it with flour. Loosely cover with plastic wrap or a tea towel for 10 minutes. Using a sharp knife or bread lame, cut a slit about ¼-inch deep across the top of the dough.
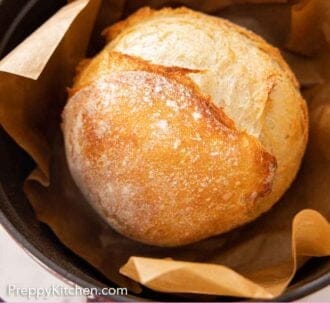
6. Place the dough with the parchment paper directly into the preheated Dutch oven. Cover with the lid. Bake for 30 minutes. Remove the lid and bake until deeply golden brown, about 15 to 17 minutes more. Carefully remove the artisan bread, and place it on a wire rack to cool for at least 20 minutes before slicing.
Pro Tips for Making This Recipe
- Make sure to check your water temperature before adding it to the dry ingredients. If the water is too hot, you risk killing the yeast. However, if the water is too cold, it won’t activate the yeast.
- For a more robust flavor, refrigerate the dough overnight as it develops more flavor the longer it is refrigerated.
- Do not skip the parchment paper as it helps you move the dough in and out of the dutch oven. It also prevents the bread from burning and sticking to the bottom of the pot.
- Avoid adding too much flour to the dough by measuring your flour correctly with a scale! Adding too much flour to the recipe is the most common mistake leading to dense bread. If you don’t have one, then fluff your flour with a spoon and sprinkle it into your measuring cup, and then level it off.
- Make sure you are using a large enough bowl for the dough. The dough should double in size as it rises.
- Make sure you’re using a large enough Dutch oven as the bread rises as it bakes.
- Don’t worry too much about making sure the dough is perfectly round. Since it’s artisan bread, it’s meant to look a little rustic. Any uneven bits give you more crispy ridges.
Frequently Asked Questions
What to serve with crusty bread?
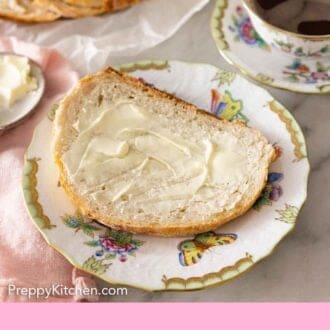
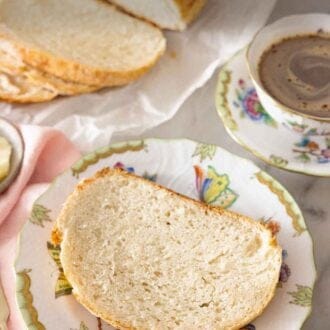
This artisan bread tastes fantastic alongside a big bowl of my chicken noodle soup recipe or my tomato soup recipe. It’s also perfect for slathering on a generous helping of pumpkin butter, honey butter, apple butter, or strawberry jam. I also love baking a loaf of artisan bread if I’m serving baked brie as it’s perfect for dipping into the melty cheese.
What can I add to the dough?
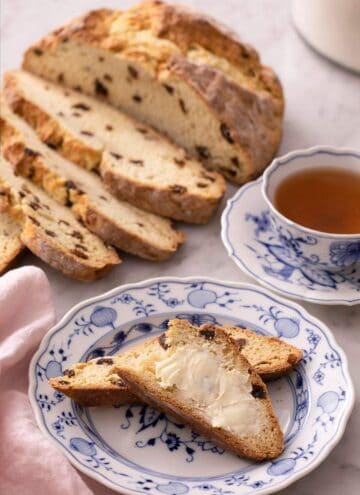
This homemade bread is very easy to modify. Mixing in fresh herbs or dried herbs, garlic, shredded cheese, dried fruit, chopped nuts, or sprinkling extra flaky sea salt on top make for tasty flavor boosters.
What if I don’t have a Dutch oven?
If you do not have a Dutch oven to bake the bread in, you can use a sheet pan, pizza stone, or even a roasting pan. A Dutch oven is ideal as the lid that traps the steam released by the bread as it bakes, giving you a crustier exterior.
How do I store the bread?
Store leftover bread loosely covered at room temperature, such as in a brown paper bag, for up to 5 days or in the refrigerator for 7 days. It will start to dry out the longer you keep it, but you can simply toast it. You can also freeze baked bread. Allow it to fully cool before wrapping it in a layer of plastic wrap and then tin foil and storing it in the freezer for up to 3 months. Thaw overnight before enjoying.
If you love this recipe try these out!


If you’ve tried this Artisan Bread recipe, then don’t forget to rate the recipe and let me know how you got on in the comments below, I love hearing from you!
Artisan Bread
Video
Equipment
- Dutch oven
Ingredients
- 3 ¾ cups bread flour divided (450 grams)
- 2 ¼ teaspoons instant yeast
- 1 ¾ teaspoons kosher salt (10 grams)
- 1 ½ cups warm water between 120°F and 130°F (360 grams)
Instructions
- In a large mixing bowl, add flour, yeast, and salt, stirring to combine with a large wooden spoon. Stir in water until the mixture is very sticky, and no lumps of flour remain. Cover and place in a warm, draft-free area until doubled in size, about 1 ½ to 2 hours.
- For an overnight rise: After mixing the dough, cover and refrigerate until doubled in size. This will take about 8 hours but will keep in the fridge up to 24 hours total.
- Preheat the oven to 450°F. Place a large Dutch oven with a lid in the oven for at least 30 minutes.
- Remove the dough from the refrigerator and let rest at room temperature for 15 minutes.
- Using lightly floured hands, reach down one side of the dough to the bottom of the bowl, pull up, and stretch the edge of the dough over the center toward the opposite side. Turn the bowl 90 degrees and repeat the folding and turning, working in a circle around the dough until the dough starts to hold its shape, about 8 to 10 rotations. Pinch any seams together at the center of the dough ball.
- Turn out the dough onto a lightly floured surface, placing it seam side down. Shape into a round loaf. Transfer the dough onto parchment paper and sprinkle it with flour. Loosely cover with plastic wrap or a tea towel for 10 minutes.
- Using a sharp knife or bread lame, cut a slit about ¼-inch deep across the top of the dough. Very carefully place the dough with the parchment paper directly into the preheated Dutch oven. Cover with the lid.
- Bake for 30 minutes. Remove the lid and bake until deeply golden brown, about 15 to 17 minutes more. Carefully remove the bread from the Dutch oven using the parchment paper to help, and place on a wire rack to cool for at least 20 minutes before slicing.
Notes
- Make sure to check your water temperature before adding it to the dry ingredients. If the water is too hot, you risk killing the yeast. However, if the water is too cold, it won’t activate the yeast.
- For a more robust flavor, refrigerate the dough overnight as it develops more flavor the longer it is refrigerated.
- Do not skip the parchment paper as it helps you move the dough in and out of the dutch oven. It also prevents the bread from burning and sticking to the bottom of the pot.
- Avoid adding too much flour to the dough by measuring your flour correctly! Adding too much flour to the recipe is the most common mistake leading to dense bread. The best way to measure flour is by using a scale. If you don’t have one, then fluff your flour with a spoon, sprinkle it into your measuring cup, and use a knife to level it off.
- Make sure you are using a large enough bowl for the dough. The dough should double in size as it rises. The same goes for the dutch oven!
- Make sure you’re using a large enough Dutch oven as the bread rises as it bakes.
- Don’t worry too much about making sure the dough is perfectly round. Since it’s artisan bread, it’s meant to look a little rustic. Any uneven bits give you more crispy ridges.
Morgan says
Just decided to make my first loaf of bread and found this recipe. My mom always cooked bread growing up and this came out EXACTLY how I imagined it!! Thank you so much!!!
CHRISTOPHER says
I’ve made this bread five times in the past week. It’s easy, takes hardly any active time and my results have been consistently excellent. The crust is crunchy while the crumb is soft yet substantial. So far, none of my loaves has lasted long enough for me to share them. I’m working on my self-control.
lui says
can you use all purpose flour?instead of bread flour ?
Walter says
I have been making Artisan style bread for many years BUT it never turned out as good as your method. It is the same ingredient as I have used before; this tastes very different. I think the overnight in the fridge sealed the deal. I am now making Ciabatta bread to test your recipe :-).
Mary says
Turns out great every time! Can this dough be doubled, at least, and held 2 days for the 2nd loaf to bake?
Veranique says
Can I use a loaf pan 9 inch by 5 inch as I don’t have any of the alternative pans you suggested.
kristina shlayan says
question! I see in the recipe notes you noted that you can add anything, like herbs and cheese, and I assume cinnamon and sugar, but you don’t indicate when to add those add ins? so if you want to make different varieties of this artisan bread, when do you add those add ins?
Johara vazir says
I prepared the dough last night and let it slow proof in the fridge. I just baked it and it turned out amazing… I added some Italian seasoning to the flour when mixing and my house smells divine!!!! Thanks for the recipe John!!!!
Terri says
My daughter and I made this and it turned out beautifully…followed directions exactly and the video was helpful. Nice even crumb and nice and crusty! Will make again!
Grace says
I’ve tried several artisan bread recipes over the last 7 months, but this is the best, hands down. I made 2 loaves last week – one for me, one for my daughter to take with her. We both agree that this is the recipe to use from now on. I’m getting ready to make another batch now.